BrightFire is excited to introduce QR codes that help you generate reviews. You can now create and deploy visually appealing creatives in a few quick steps that your customers can use to review you instantly and conveniently. All your customers need to do is scan it with their phones and leave a review. BrightFire can help you create codes in one shot for every location of a multi-location business, too.
You can set up posters, table tents, and countertop standees, distribute cards with your products, or even add the basic code to your bill receipts or other documents like pamphlets, catalogs, menus, etc. You can get really creative in introducing the code at critical touch points where you feel it is the best time for them to scan the code and review you.
QR CODE GENERATION
To create a QR code, follow these steps:
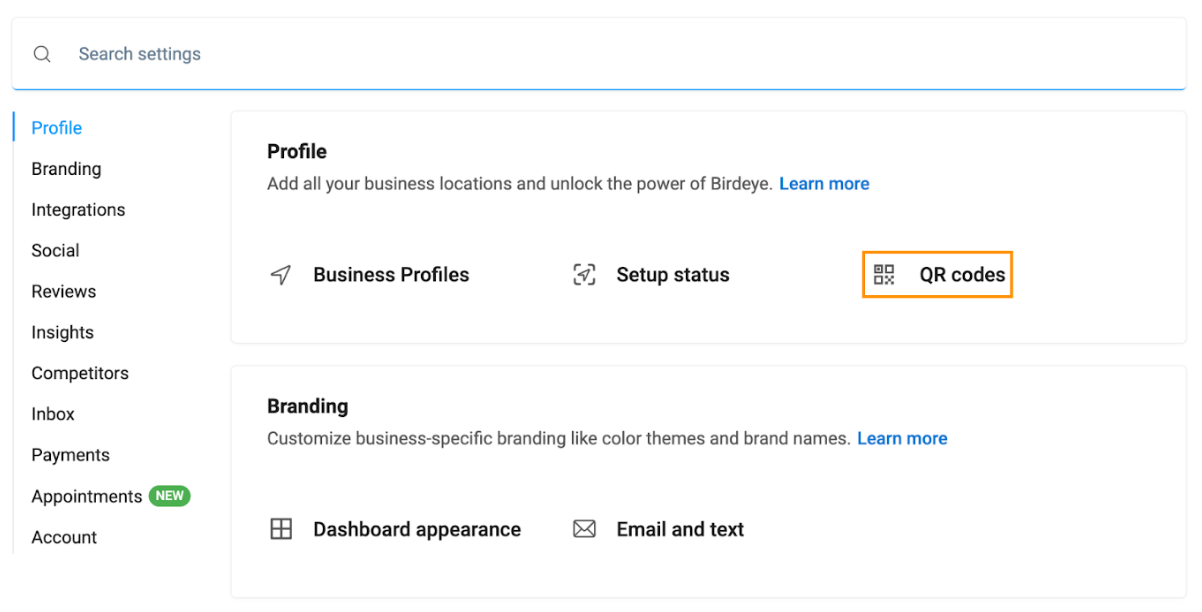
Step 1 - Click the 'Settings' icon at the top right corner.
Step 2 - Navigate to the 'Profile' tab and click the 'QR codes' option.
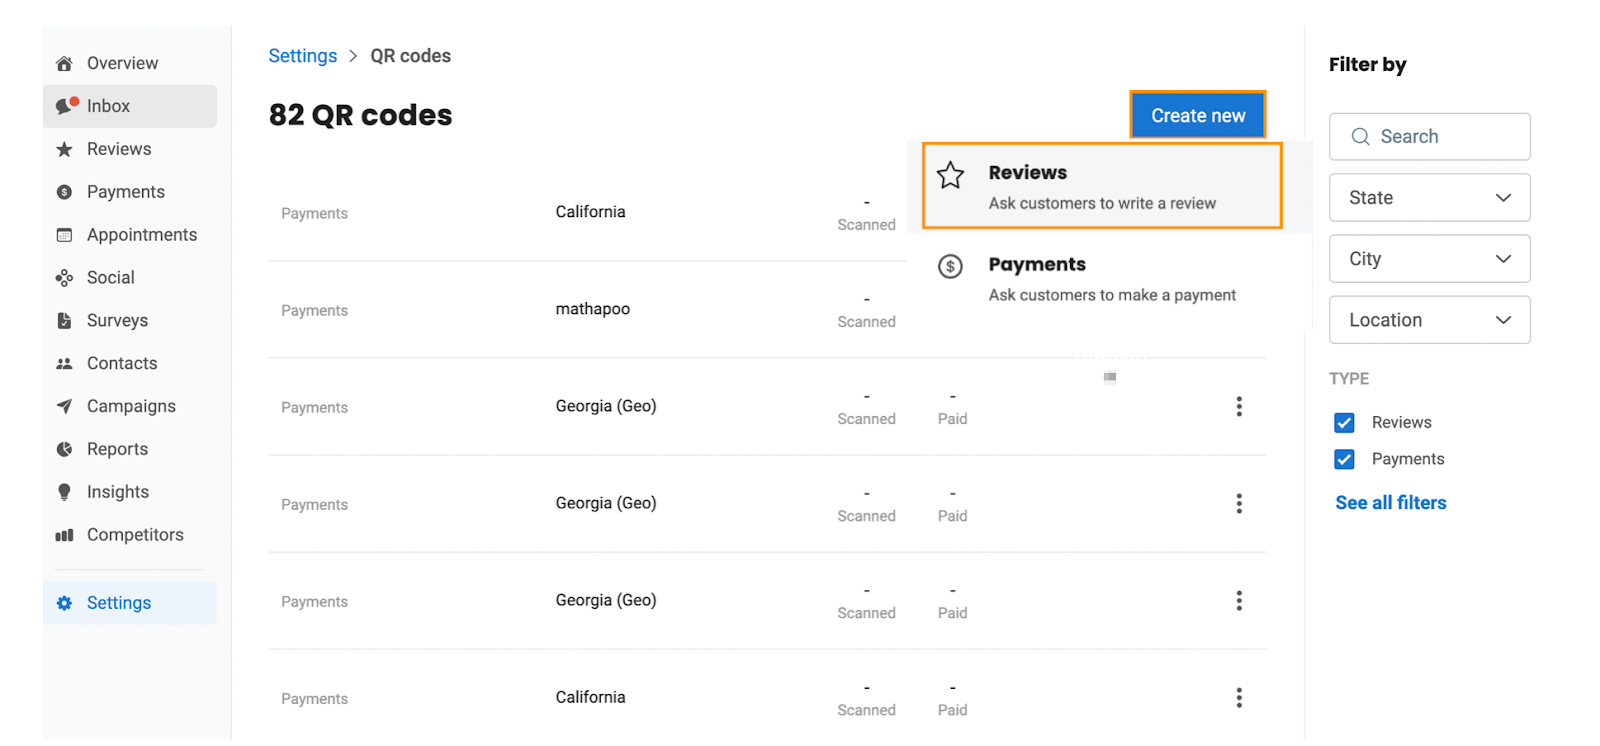
Step 3 - Click on the 'Create new.' Select 'Reviews.'
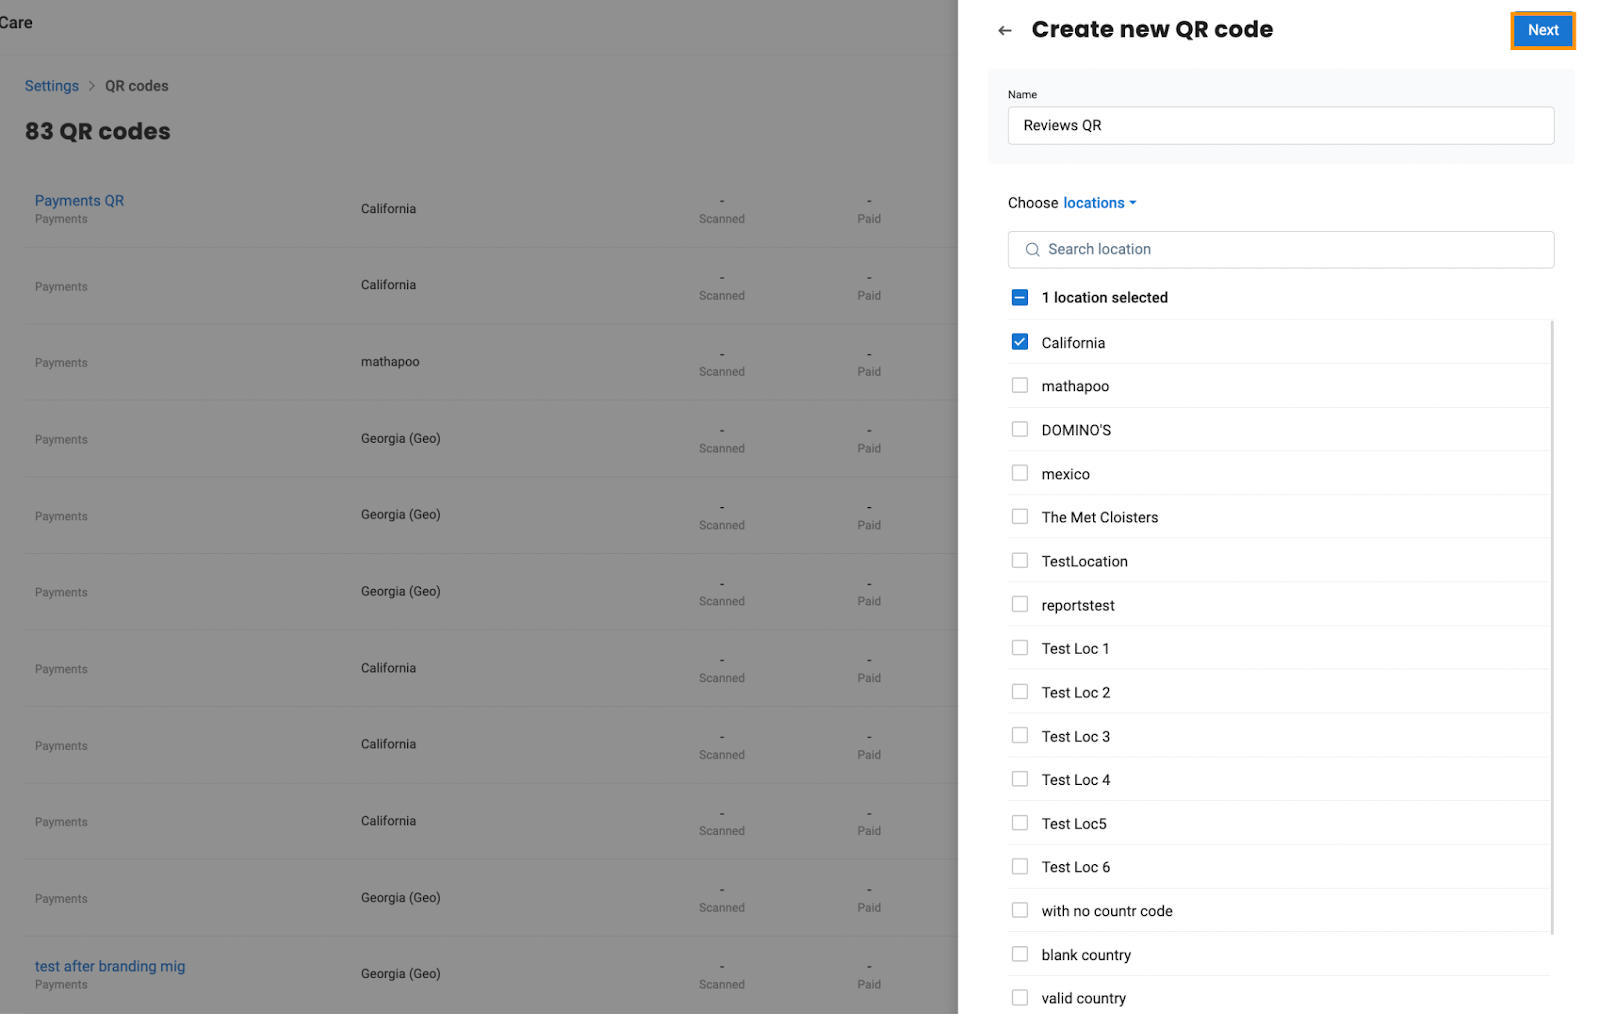
Step 4 - A drawer will appear on the right-hand side. Name the code and select the location(s) (for multi-location)business. Click on the 'Next' button to proceed.
When selecting multiple locations, each location will have a unique code. So, creating a code for 5 locations will generate 5 codes with a common configuration of how it is set up.
Step 5 - A QR code is generated, and you can configure it according to your specifications. You can change the layout and add a background and text to make it more relatable to your brand’s theme. This feature allows you to add or change stickers, logos, and business names/aliases as required.
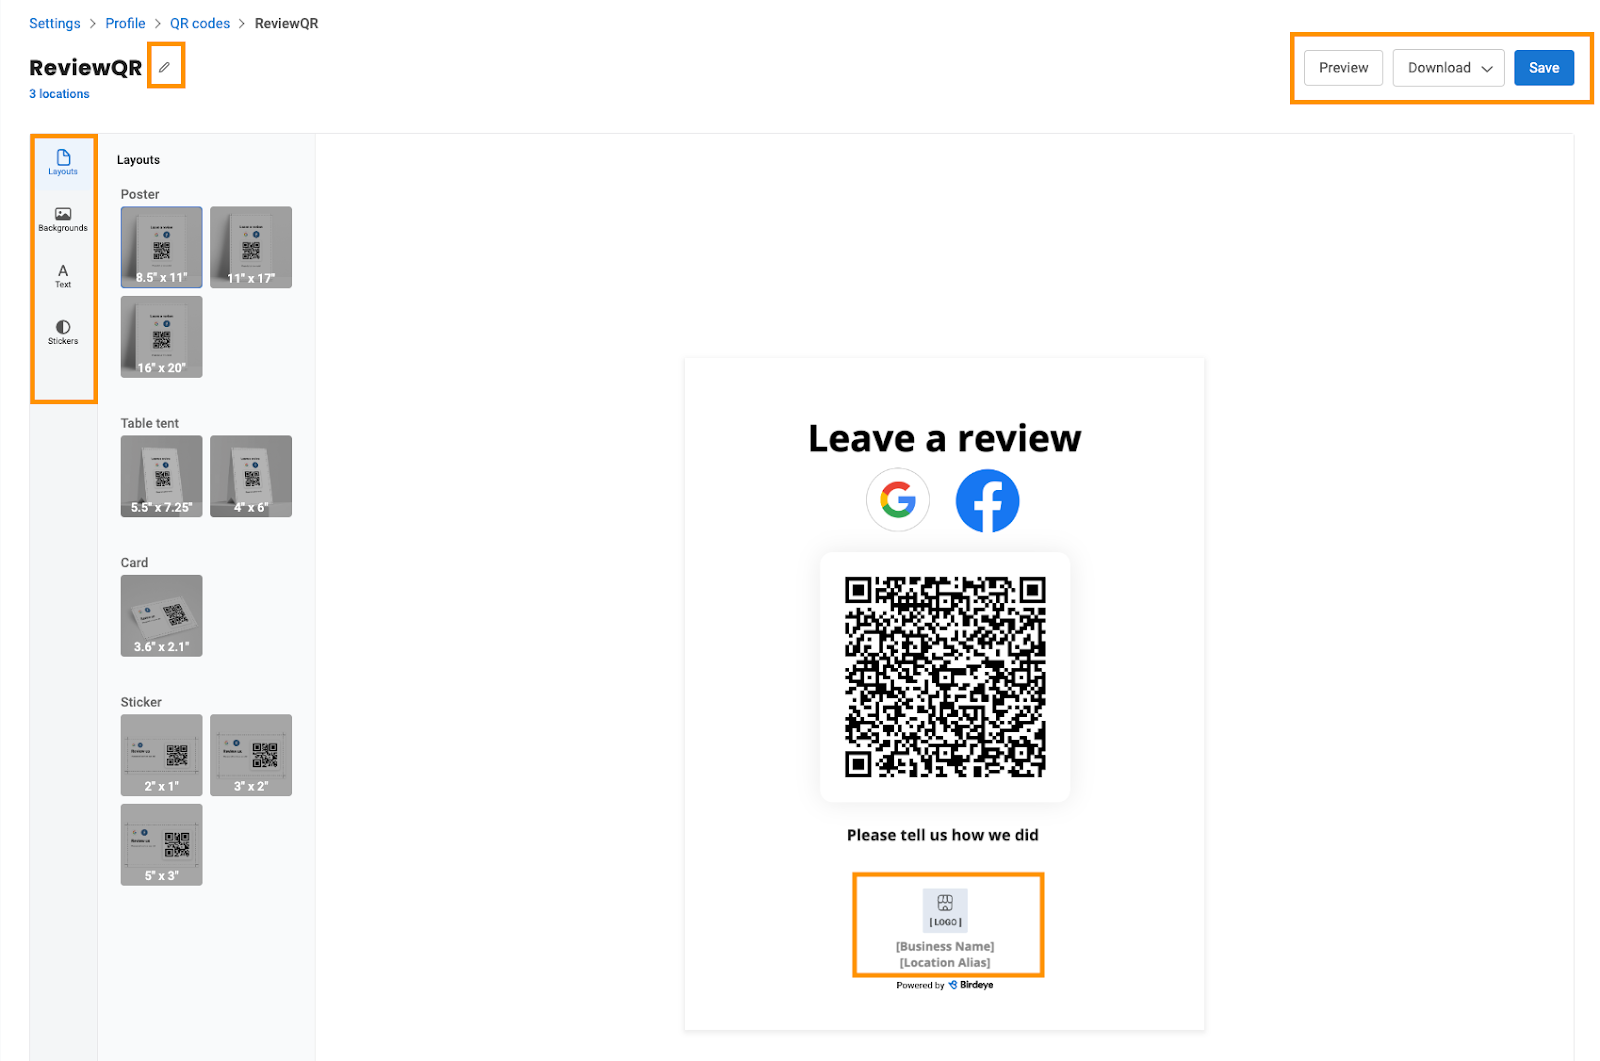
You can view the appearance of the QR code by selecting the 'Preview' option without downloading it to see its final appearance.
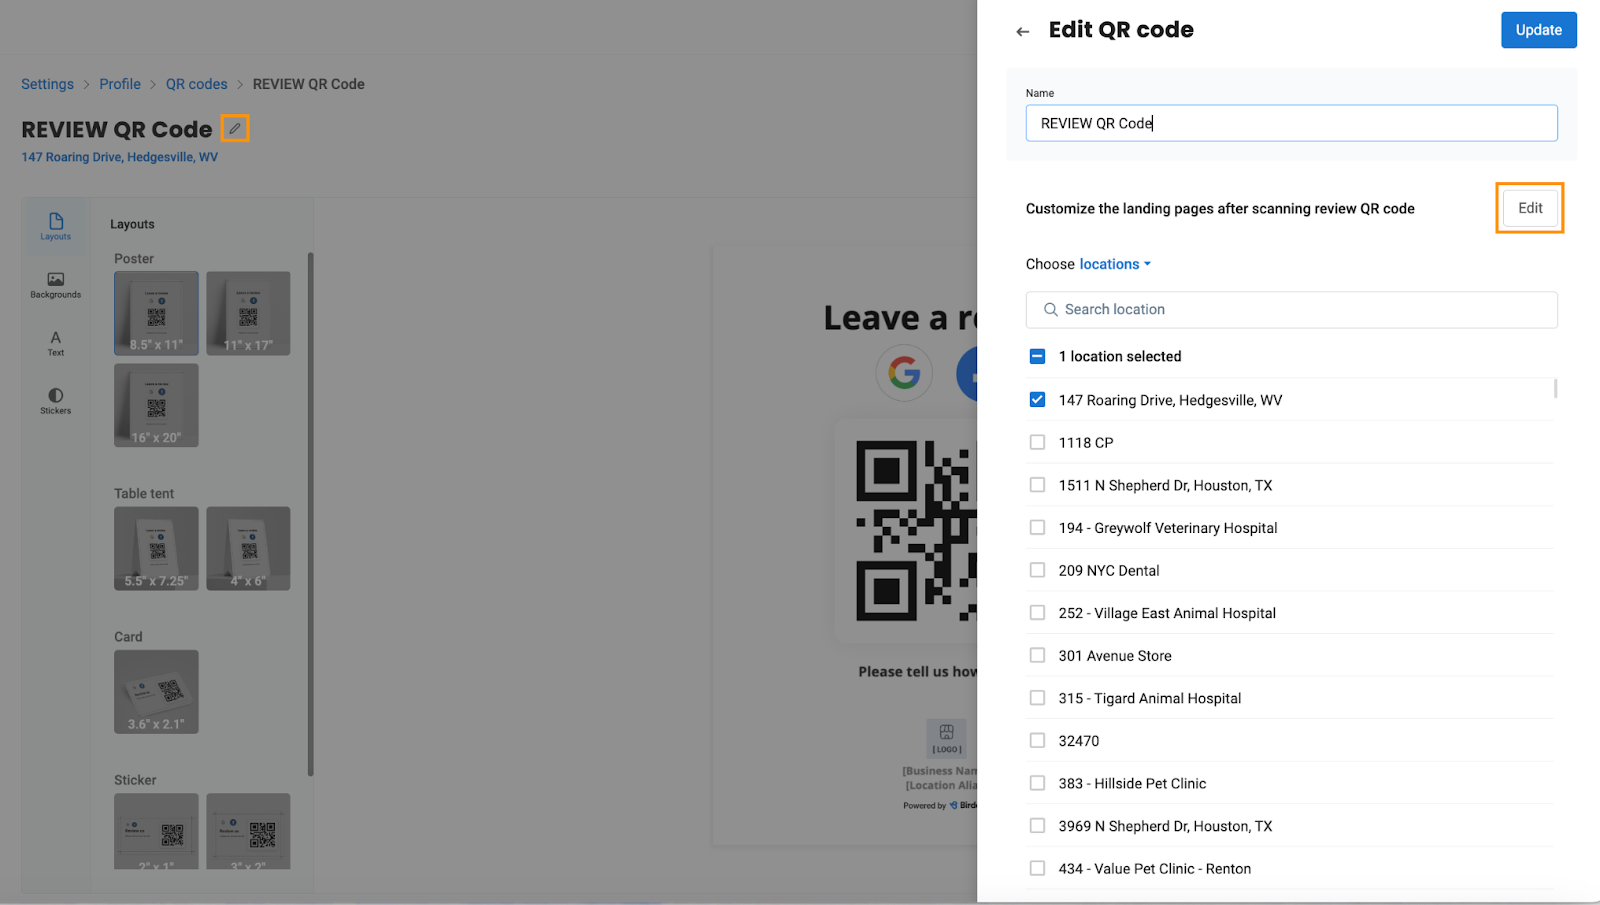
Step 6 - To edit other aspects of the QR code, click the 'Pencil icon.' A drawer will appear, and you can customize the landing page experience. Click the ‘Edit’ button. Additionally, you can change the name you provided and the locations selected from here.
Step 7- Edit and preview the landing and thank you pages to align with your business preferences.
Once you have created the code and customised the post-scan landing page experience, preview the code once more and scan it with your phone to preview the end-to-end experience first-hand from a phone.

Step 8 - Click the 'Save' button to save the QR code. A successful notification will appear on the screen stating, 'QR code has been created.' You can now download and deploy them however you need to.
- You can also download the QR code by clicking the 'Download' option.
- If you offer your customers Wi-Fi at your premises, ensure that the network you use to manage your Google Business Profile differs from what your customers use to review you on Google. Google is not very accepting of reviews made from the same IP used to manage your profile. Ideally, customers should leave your Google reviews using their own mobile internet instead of using your business Wi-Fi.