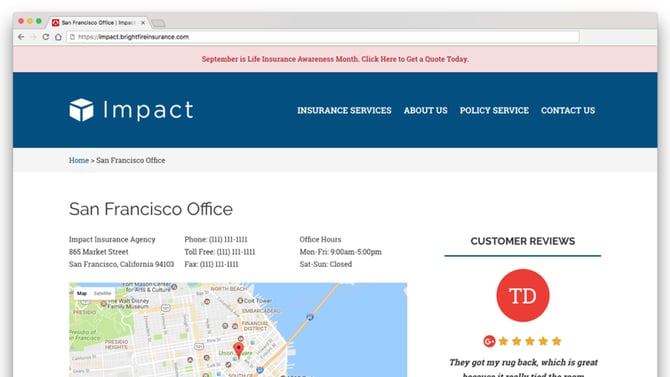
The BrightFire Notification Bar enables you to display a colorful, easy-to-see notification and alert bar at the top of your agency website. This notification bar allows you to notify your website visitors about changing office hours, marketing promotions, special events, emergency notices, holiday announcements, etc. The Notification Bar is customizable, and it appears clearly on both desktop and mobile formats.
If you would like to install the Notification Bar on your website yourself, follow the instructions below.
Otherwise, you can submit a notification bar update request by clicking here.
Install The Notification Bar
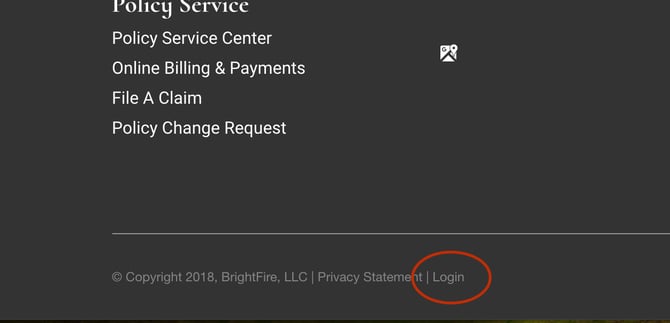
Login to your website Dashboard via the small gray “Login” button at the very bottom of your home page.
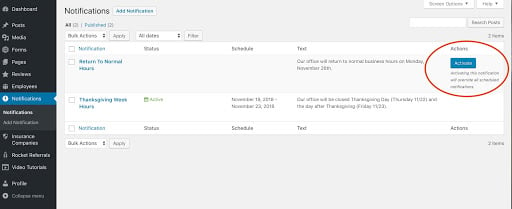
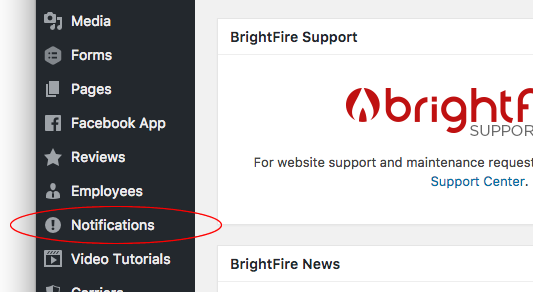
Once you have logged in, hover your mouse over the "Notifications" section on the left-side navigation menu. This will cause two submenus, “Notifications” and “Add Notification,” to appear. If you would like to view and edit a list of all existing notifications, click the “Notifications” submenu. If you would like to add a new Notification Bar, click the “Add Notification” submenu.
Configure your notification using the following options:
- Notification Title: This title is only used in the administration area to give each notification a name. Your customers will not see it.
- Notification Message: This is the actual text that will be displayed on your Notification Bar. This text is limited to 120 characters. Under this text box, a character counter will update as you type so that you will know when you are nearing the character limit.
- Link (optional): If you would like your notification bar to link to a particular page or post of your website, you can choose which content to link to here.
- Schedule (optional): If you would like to set a scheduled date range for your notification to be displayed, you can choose those dates here. Please note that you will not be able to select any dates which are already reserved by existing notifications. Additionally, if you do not set a scheduled date range, your notification will need to be manually turned on and off after you finish creating it.
- Appearance: Your Notification Bar can be green, blue, yellow, or red. You can customize the color scheme that best fits your website.
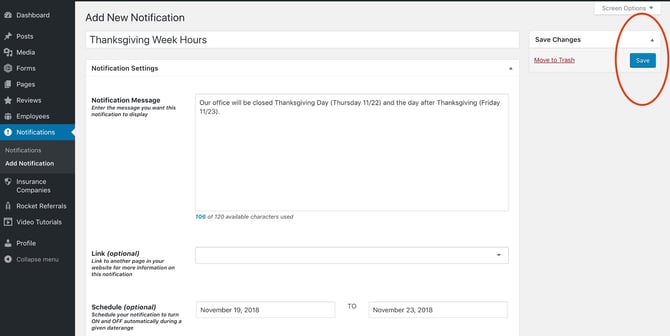
Click the blue "Save" button on the top right in order to finish creating your notification.
- If you set a schedule, your notification will automatically become active when the scheduled date range begins and will automatically deactivate when the scheduled date range ends.
- If you did not set a schedule, click on the "Notifications" section from the left side navigation menu. You will be shown a list of all existing Notifications. For your new notification that does not have a set schedule, click the blue "Activate" button under the Actions column on the right side of the page. Once the notification has been turned on, the "Activate" button will be replaced by a "Deactivate" button. Since the notification does not have a scheduled date range, you will need to return to this page and disable it manually when you no longer want the notification to display.