Part 1: Getting Started
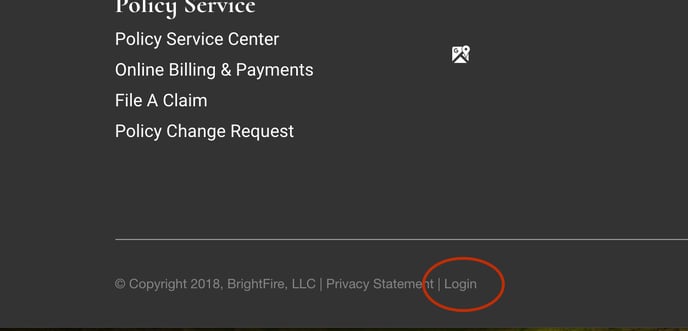
Begin by logging in to your BrightFire website via the small gray “Login” button at the very bottom of your home page.
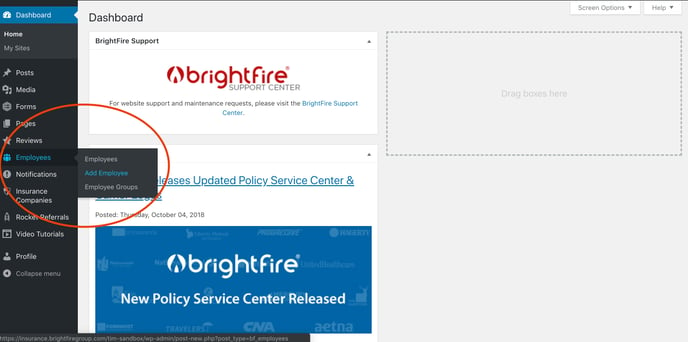
Once you are logged in, hover your mouse over the tab labeled “Employees” on the left side of the screen. This will cause three new submenus for ”Employees,” “Add Employee,” and “Employee Groups” to appear. Click on “Add Employee.”
Part 2: Adding Your Employee Bio and Other Information
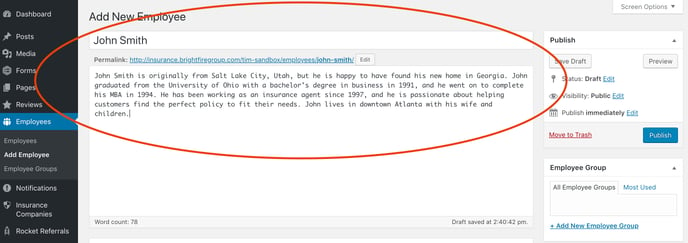
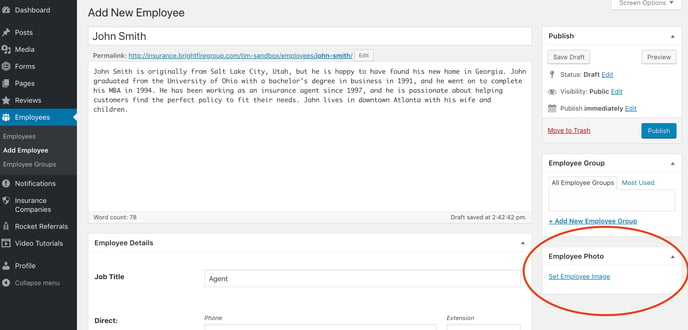
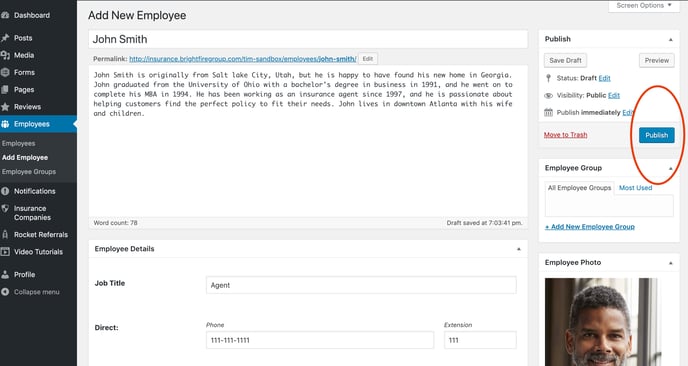
Once you are on the “Add Employee” screen, begin by adding the employee’s name in the top bar. From there, you can type a short employee bio into the main text box in the center of the page. If you already have a bio for this employee written elsewhere, you may find it easier to simply copy and paste the existing text onto this page.
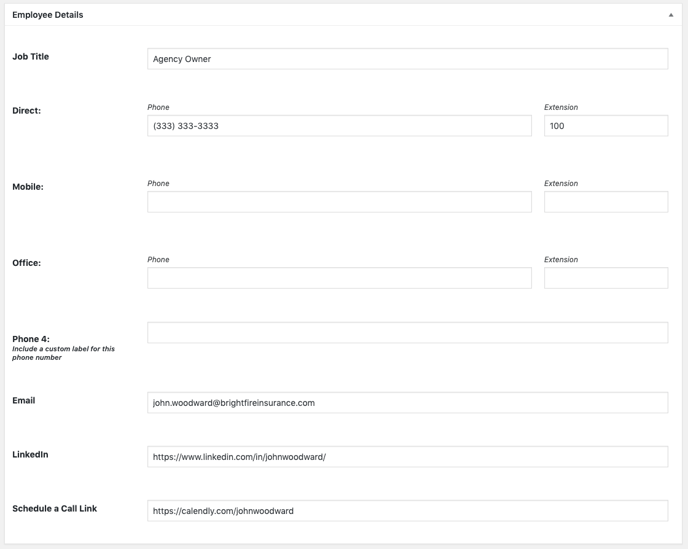
Below the employee bio are several other text fields that allow you to add additional employee information, including job title, multiple phone numbers, email, LinkedIn profile link, and call scheduling link. This information is not required, but it is a good idea to add it if you want your customers to be able to contact your employees more easily.
The Schedule a Call Link can be used with services like Calendly, Acuity Scheduling, or Doodle in order to open your call scheduling link in a new tab.
Part 3: Adding a Photo
We recommend adding photos of your employees so that customers can match a face with a name before they visit your office in person. To upload an employee photo, start by clicking on the blue underlined “Set Employee Image” link on the right side of the page. It is located under a larger header titled “Employee Photo.”
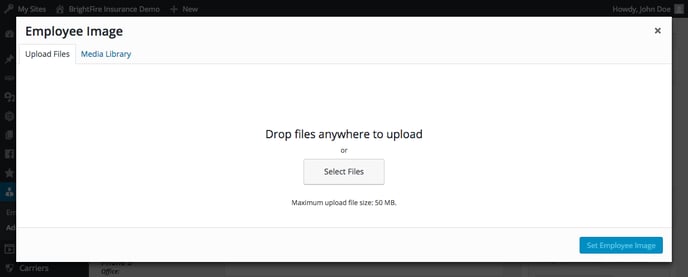
Once you click on this link, you will be taken to a screen that allows you to upload a photo. You can either drag and drop a photo anywhere within the white box, or you can click on the “Select Files” button to search through your computer for a picture to upload.
NOTE: If you click on the “Set Employee Image” link and it takes you to a list of images you’ve already uploaded instead of the white screen for adding a new image, simply click the “Upload Files” tab in the upper left corner in order to add a new image.
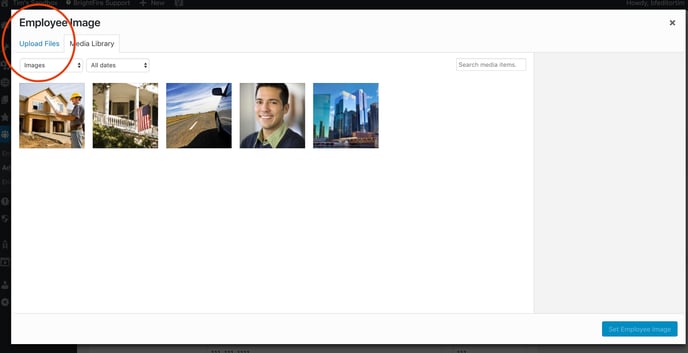
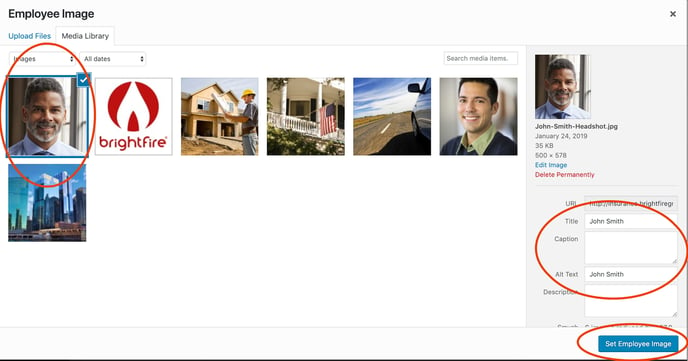
Once you have added a new image, it will appear with a check next to it under the “Media Library” tab. The information about the image will also appear on the right side of the screen and allow you to edit the title and alt text.
You can set the image alt text to whatever you like, though we recommend something that describes the image in a few brief words. This will not only make it easy to find the image in the future, but it will also allow screen readers to provide an image description when they dictate the info on your page for blind or vision-impaired people. As such, if you are adding an image of John Smith, you could set the image alt text to “photo of John Smith,” “Agent Smith photo”, or something similar.
Titles, on the other hand, are not required and are only used to offer information when someone hovers their mouse over an image. This feature is not strictly necessary, but if you would like to include it for good measure, consider titling the image something similar to the alt text.
When you are finished, simply click the blue “Set Employee Image” button in the bottom right corner to save the selected image to the employee’s profile.
If you would prefer to use an image that you have already uploaded in the past, find that image within the Media Library and click it so that the check appears in the corner of the image and the image information appears on the right side. Once you have located and clicked the existing image that you want, click the blue “Set Employee Image” button in the bottom right corner to apply the image.
Part 4: Publishing Your Employee Post
Now that you have filled out the relevant information for your employee profile, you’re ready to publish!
Simply click the blue “Publish” button on the right side of your screen and your new content will be published.
Important: New content can take up to 15 minutes to show up on your live website.
Part 5: Reordering Employees
Reordering employees allows you to change the order in which your employees appear on the “Meet Our Staff” page of your website. If you would like certain employees to appear higher up on the page than others, this is where you will make that adjustment.
Additionally, any new employees you add will automatically appear at the top of your employee list, so you will need to follow these steps in order to move them farther down.
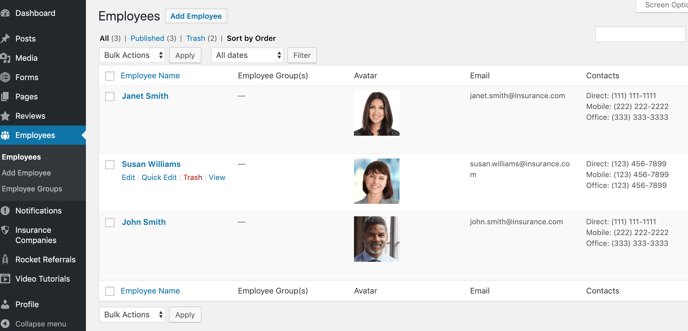
To start, hover your mouse over the “Employees” tab on the left side of your screen until the “Employees” submenu appears. Click on the “Employees” submenu to see a list of all published employees.

Once you are on the Employees page, hovering your mouse anywhere over an employee’s profile bar will cause your mouse arrow to transform into a symbol that looks like a small diamond with arrows pointing up, down, left, and right. When your mouse arrow becomes this symbol, it means that you can drag and drop the employee profile bars into whichever order you want.
Consider the example below. If you would like Janet Smith to appear beneath Susan Williams on your “Meet Our Staff” page, simply click on Janet’s bar and, while still holding down the left mouse button, drag Janet’s bar down until Susan’s bar jumps up. Once you have dragged Janet’s profile bar into the desired location, release your mouse button to let the bar fall into place. Your website will save and apply this reordering automatically.
Important: Employee reorder updates can take up to 15 minutes to show up on your live website.